
This do-it-yourself method results in ready-to-hang artworks without the hassle or expense of matting, framing, and glass!
I use the ten-step sequence that follows for all my works on paper, and it can be used for prints as well. I'll guide you step-by-step to get great results that don't break the bank!

But first, a Materials List (the brands I prefer are in parentheses):
-A Large Work Space, covered with paper if needed
-1" Flat, Soft Brush (Winsor & Newton Sceptre 606) used for both glue and Acrylic Gloss Medium)
-Silicone Pastry Roller, 2" wide (optional but effective)
-X-acto knife
-X-acto knife
-Spray Bottle filled with water
-Three Small wide-mouth Jars; one each for water, glue, and acrylic medium
-Paper Towel
-Parchment Paper for baking, pre-cut into squares slightly larger than artwork
-Books or similar weights
-Cradled Hardboard Panel (Blick Studio Birch Wood Panel, Cradled)
-UV Protectant Spray Varnish (Krylon UV Archival Spray Varnish 1375 Gloss)
-Rubber or Nitrile Gloves
-Liquid Adhesive, clear-drying (Lineco Archival Quality Neutral pH Adhesive)
-Sanding Block
-Acrylic Gloss Medium (Liquitex Gloss Medium)
Optional (for a hard, glossy, non-"tacky" finish):
-Clear Varnish (Liquitex Soluvar Gloss Varnish)
-Small Jar for the varnish
-Small Jar for the varnish
-1" Flat, Soft Brush (Don't use the same brush you used for the glue and Gloss Medium)
-Paint Thinner
Once you have all the materials and are used to the process, you'll be able to mount a great many artworks (I often do a bunch at the same time) quickly and inexpensively!
Tip: Practice on a small, non-valuable print first--it's a good way to become familiar with the process, if you are unsure.

Seal the piece with spray varnish, outside or in a spray booth (to keep the stuff out of your lungs) and wear gloves (to keep it off of your skin). Let the artwork dry for at least a couple of hours. I wait until the smell of the spray varnish is gone.
(Whenever you are mounting an artwork done on paper (watercolor, gouache,
pen and ink, mixed media, or a print) it's important that you seal the
art with a couple coats of spray varnish to ensure that nothing will
bleed during the process.)

Step Two: Set up the work area
While you're waiting for the spray varnish to dry, arrange your work space, because you don't want to be scrambling for tools or materials once you get started. Above is the arrangement I set up every time before beginning.
While you're waiting for the spray varnish to dry, arrange your work space, because you don't want to be scrambling for tools or materials once you get started. Above is the arrangement I set up every time before beginning.
Clockwise from lower left: cradled hardboard, silicone roller and artwork/print, two or three pieces of pre-cut parchment paper (they tend to roll up), liquid adhesive in a small, wide-mouth jar, a jar of water in which to clean the brush at intervals, and spray bottle filled with water, 2" flat brush, roll of paper towel and a couple wads of damp paper towel (seen on top of the jar), and a length of paper towel on which to work.
Tip: If it's a very dry or hot day, and you are mounting a larger artwork or print, it's a good idea to run a humidifier in the work room for an hour or so before you get started. This allows more time to glue, adjust, and mount the piece.
Now you're ready to mount the art!
 Step Three: Pre-wet the cradled wood
Spray the cradled wood surface (away from the work space) and then even out the water on the surface with your fingertips. Set aside.
 Step Four: Pre-wet the art or print
Spray the back of the art/print, and even out the water on the surface with your fingertips. It's crucial that you make sure the edges and the corners are evenly damp.
Tip: If it's a very dry or hot day, and you are mounting a larger artwork or print, it's a good idea to run a humidifier in the work room for an hour or so before you get started. This allows more time to glue, adjust, and mount the piece.
Now you're ready to mount the art!

Spray the cradled wood surface (away from the work space) and then even out the water on the surface with your fingertips. Set aside.

Spray the back of the art/print, and even out the water on the surface with your fingertips. It's crucial that you make sure the edges and the corners are evenly damp.
Tip: If the art/print curls up, I gently uncurl it face-down onto a piece of paper towel on the work space.


Step Five: Apply the glue
Working quickly, spread glue onto the cradled wood surface, then do the same on the back of your artwork or print.
Working quickly, spread glue onto the cradled wood surface, then do the same on the back of your artwork or print.
On both surfaces be sure there is glue all the way onto the edges and corners of both the block and the paper. Try to apply a thin, even coating--too much glue will squirt out the sides when weighted, too little and the artwork won't adhere properly. Still, it's better to have too much as excess can be cleaned off.
Tip: If the glue seems sticky as you apply it to the wood, lightly re-spray it with water and then add a bit more glue. This will make positioning the paper easier once it is on the block.
Another Tip: If your artwork is on a heavier, absorbent paper like watercolor paper, you will have to use more glue. This will allow more time to move the print into alignment on the block, but may also cause more glue to squirt out the edges when weighted.
Another Tip: If your artwork is on a heavier, absorbent paper like watercolor paper, you will have to use more glue. This will allow more time to move the print into alignment on the block, but may also cause more glue to squirt out the edges when weighted.

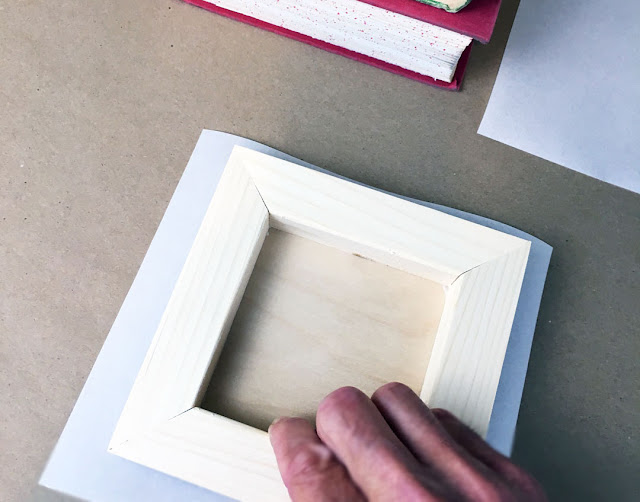
Step Six: Position the art
Carefully position the paper onto the wood surface. If the wood surface is damp enough, you will often be able to slide the paper into position. This step can be tricky, but if you work quickly and there's humidity in the air, you should be able to lift and re-position a few times.
Carefully position the paper onto the wood surface. If the wood surface is damp enough, you will often be able to slide the paper into position. This step can be tricky, but if you work quickly and there's humidity in the air, you should be able to lift and re-position a few times.

Step Seven: Adhere the art
When you are sure of its position, place a piece of the pre-cut parchment paper over the artwork and smooth down with your fingers, making sure to press firmly outward from the center, all the way to the edges and corners.
 Optional (but helpful): Use the silicone roller; again working from the center outward. This effectively presses every inch of the paper to the wood.
 A bit of excess glue will probably squish out along one or all of the edges at this point, so now is a good time to gently clean the edges using a wad of the damp paper towel.
Tip: If your artwork has stretched to slightly larger than your wood block, no worries. The extended edges can be trimmed or sanded off easily once the piece is dry.
When you are sure of its position, place a piece of the pre-cut parchment paper over the artwork and smooth down with your fingers, making sure to press firmly outward from the center, all the way to the edges and corners.


Tip: If your artwork has stretched to slightly larger than your wood block, no worries. The extended edges can be trimmed or sanded off easily once the piece is dry.


Set your mounted artwork face down on one of the already pre-cut-to-size pieces of parchment paper. Carefully stack books and/or weights on top. Check the edges once more for excess glue and wipe with more damp paper towel if necessary. Let dry. I give it a good eight hours, depending on the weather/humidity. Now's when you turn off the humidifier :)
Tip: If your artwork is on heavyweight paper (like 300 lb watercolor paper), it won't want to lay flat onto the block when you try to position it--but no worries! In that case, the extra glue will usually allow you to move the block until the art is aligned after you lay it upside down.


Step Nine: Trim and sand
When the piece is dry, trim or sand the extended edges (if any) with an X-acto blade or sandpaper block. After this I like to gently sand (chamfer) the edges and corners of the whole mounted block--a purely personal choice.
When the piece is dry, trim or sand the extended edges (if any) with an X-acto blade or sandpaper block. After this I like to gently sand (chamfer) the edges and corners of the whole mounted block--a purely personal choice.

Brush on an even coat, taking care not to over-brush. Just put it on quickly and even it out. (If your artwork is on absorbent paper, a second coat may be desired, but make sure the first coat is completely dry.) A layer of Gloss or Matte Medium gives the art a protective coating. (It's also absolutely necessary if the optional, final varnish of Soluvar is desired.)


Acrylic Gloss (and Matte) mediums tend to stay slightly tacky, even when completely dry. I don't like that at all, so I use a final coating of Liquitex Soluvar on all my mounted artworks (and on all my finished acrylic paintings). Soluvar dries quickly and gives the artworks a very hard, non-sticky finish that resists dust and is easy to clean.
You will need a soft brush, a wide-mouth jar for the Soluvar, paint thinner for cleaning the brush, and gloves to keep the varnish off of your fingers. I like to set the varnished art on a piece of parchment, or on top of a jar. That way if the Soluvar (which is runnier than acrylic mediums) drips, it won't stick to a table top or surface.


Hope this gets you on your way to some great, frame-free, ready-to-hang art.
Feel free to email me with any questions you might have at tom@tomsarmo.com
Thanks for checking this out--hope you found it helpful!

What a great DIY tutorial! Thank you for sharing!!!!!!
ReplyDeleteYou are welcome, Miss Gladys--cutting mats, cleaning glass, and building/buying frames was killing me, haha! I figured I had company in that :)
DeleteBTW, great sample art pieces, too!
ReplyDeleteThank you--glad to hear you like them :)
DeleteWhat perfect timing! My wife and I have been trying to figure out how to mount some prints we recently bought. Thanks! Still teaching me things even after all these years.
ReplyDeleteNice--glad this can be a help, and very glad to hear from you, Chris!
Delete